Table of Contents
What is the Method Statement for Aluminum Flashing Installation?
This method statement outlines the steps required to achieve a watertight and durable installation of aluminum flashing.
Aluminum flashing is commonly used to prevent water penetration at critical locations such as roof intersections, wall penetrations, and windowsills.
Materials and Tools Required
Aluminum Flashing Material (typically pre-painted aluminum for corrosion resistance)
Appropriate Fasteners (screws or nails)
Sealant or Caulk Compatible with Aluminum
Measuring Tape
Utility Knife
Straightedge
Tin Snips
Drill or Impact Driver
Hammer
Safety Equipment (gloves, safety glasses, and appropriate clothing)
Ladder or Scaffolding (if required)
Procedure
Safety Precautions:
Before commencing work, ensure that all personnel involved in the installation are equipped with the necessary safety gear.
Conduct a thorough safety briefing to ensure everyone understands the potential hazards associated with the task.
Site Preparation
Ensure the work area is clean and free from debris.
Inspect the substrate (e.g., roof or wall) to verify proper preparation and absence of irregularities.
Cutting the Flashing
Measure the length and width of the area where the flashing will be installed.
Cut the aluminum flashing material to the appropriate size using tin snips or a utility knife.
Ensure clean, straight edges during the cutting process.
Marking and Placement
Determine the precise location where the flashing will be installed.
Mark the exact positions for fasteners and overlap points on the substrate.

Pre-drilling Holes
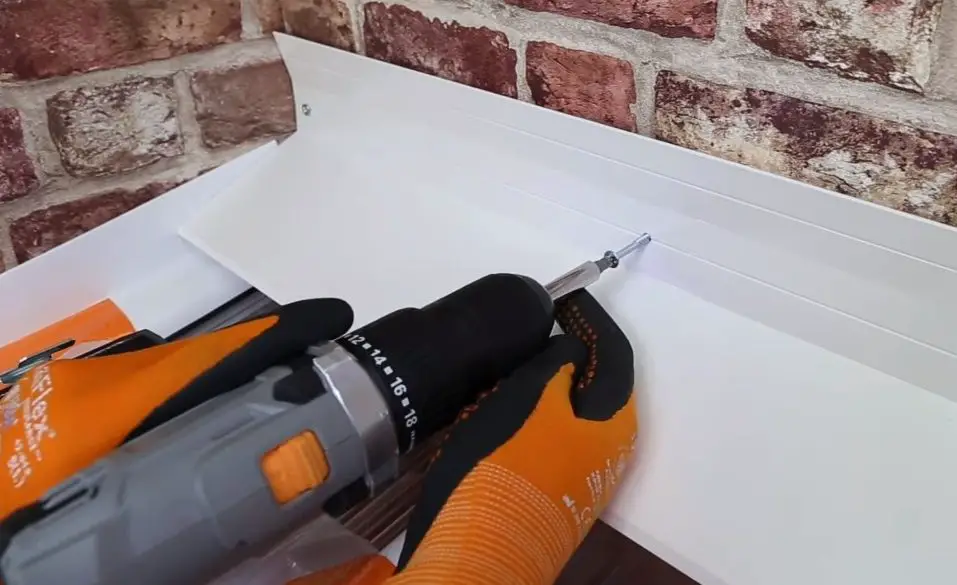
Pre-drill holes for the fasteners in the aluminum flashing.
Ensure that the holes are slightly larger in diameter than the fasteners.
Follow manufacturer recommendations for hole spacing (typically around 12 inches apart along the length of the flashing).
Installation
Position the aluminum flashing in the designated location, ensuring proper overlap where necessary.
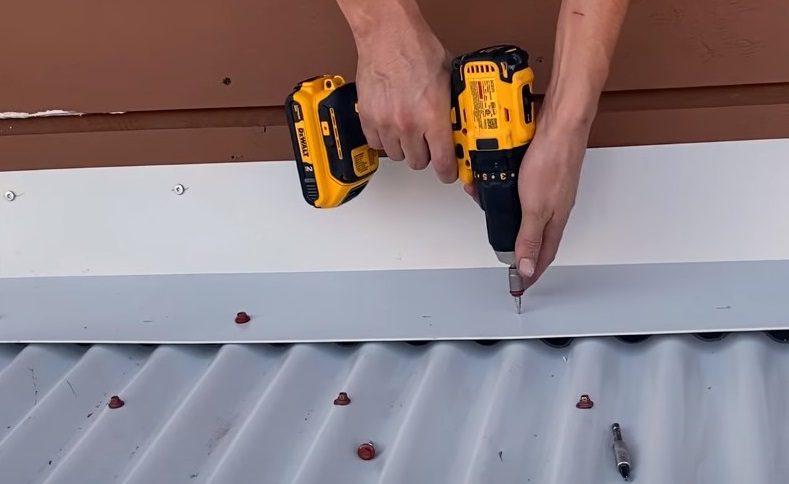
Secure the flashing to the substrate using appropriate fasteners (screws or nails).
Avoid overtightening to prevent damage to the flashing or substrate.
Verify that the flashing is level and correctly aligned.
Sealing Joints and Penetrations
Apply a compatible sealant or caulk to joints, corners, seams, and around fasteners.
Smooth the sealant to create a watertight seal.
Quality Control
Inspect the installed aluminum flashing to ensure secure attachment, proper alignment, and effective sealing.
Check for any visible defects, wrinkles, or creases in the material.
Cleanup
Remove excess sealant and dispose of waste materials appropriately.
Maintain a clean work area.
Documentation
Record Keeping: Maintain detailed records of the installation process. Capture photographs and take notes to create a comprehensive documentation trail for future reference.
Final Inspection
Thorough Assessment: Conduct the final inspection. Verify that the aluminum flashing is correctly installed and meets the required standards.
Address any discrepancies promptly to ensure a high-quality outcome.
Method Statement Overview
This method statement serves as a general guideline for installing aluminum flashing in construction projects. However, keep in mind the following considerations:
Manufacturer Recommendations: Always adhere to the manufacturer’s specific instructions for the chosen aluminum flashing material.
Project-Specific Requirements: Installation methods may vary based on the type of flashing and the project’s unique conditions.
Local Codes and Regulations: Comply with local building codes and regulations during installation.
Remember that precise installation practices contribute significantly to the durability and performance of your construction project. If you encounter any challenges, consult with fellow professionals or refer to industry best practices.

FAQs
How do I know if my flashing needs to be replaced?
Knowing when to replace your flashing is crucial for maintaining the integrity of your building. Here are some signs that indicate it might be time for replacement:
Visible Damage:
- Inspect the flashing for visible signs of damage, such as rust, corrosion, or dents.
- Look for cracks, holes, or gaps in the material.
- If you notice any of these issues, it’s a clear indication that replacement is necessary.
Water Leakage:
- Water stains or dampness around windows, doors, or roof intersections are red flags.
- If you experience water leaks during heavy rain or snow, your flashing may be compromised.
- Promptly address leaks to prevent further damage to the underlying structure.
Aged Flashing:
- Consider the age of your flashing. Over time, exposure to weather conditions can degrade its effectiveness.
- If your flashing is several decades old, it’s advisable to replace it even if there are no visible issues.
Loose or Dislodged Flashing:
- Inspect the flashing to ensure it is securely attached.
- Loose or dislodged flashing won’t provide adequate protection against water infiltration.
- Reattach or replace loose sections promptly.
Worn Sealant or Caulk:
- Check the sealant or caulk around the flashing joints and penetrations.
- If the sealant is cracked, dried out, or missing, it’s time for resealing or replacement.
Frequent Repairs:
- If you find yourself repeatedly repairing the same flashing, it’s a sign that it’s no longer effective.
- Invest in new flashing to avoid ongoing maintenance headaches.
Visible Wear and Tear:
- Inspect the flashing for wear and tear caused by exposure to UV rays, temperature fluctuations, and other environmental factors.
- Faded color, brittleness, or warping are indicators of aging.
Remember that proactive replacement is essential to prevent water damage, mold growth, and structural issues. Consult a professional if you’re unsure about the condition of your flashing.
What is the difference between aluminum and copper flashing?
Material Characteristics:
- Aluminum Flashing:
- Advantages:
- Affordability: Aluminum is budget-friendly, making it a popular choice for builders and homeowners.
- Ease of Work: Bending aluminum is relatively easy, which can reduce installation time.
- Disadvantages:
- Pitting and Oxidation: Aluminum tends to pit and oxidize, especially in salty or polluted air. It may not hold up well in urban or seaside environments.
- Compatibility: Aluminum doesn’t play well with certain building materials like pressure-treated wood, concrete, and alkaline masonry materials.
- Limited Complexity: Aluminum cannot be soldered, limiting its use in complex flashing projects.
- Copper Flashing:
- Advantages:
- Durability: Copper, especially cold-rolled copper, is very durable.
- Versatility: Copper can be easily soldered, allowing for more complex flashing designs.
- Compatibility: Copper works well with most other building materials (except galvanized steel, redwoods, and cedar).
- Disadvantages:
- Cost: Copper flashing is expensive due to its durability and hardness.
- Discoloration: Over time, copper develops a green or brown patina (the “Statue of Liberty” effect). Some love this, while others find it stains wood siding and trim.
Longevity and Maintenance:
- Aluminum: May require more frequent replacement due to oxidation and wear.
- Copper: Outlasts aluminum significantly and provides long-lasting protection.
Environmental Considerations:
- Aluminum: Not ideal for coastal or polluted environments.
- Copper: Naturally resists saltwater corrosion, making it suitable for coastal areas.
Choose copper flashing if you prioritize longevity, versatility, and compatibility with various materials. Opt for aluminum flashing if budget-friendliness and ease of installation are your primary concerns. If you have specific project requirements, consult with experts to make an informed decision!
Source:
(1) Aluminum vs Copper Flashing | Vortex Metals. https://www.vortexmetals.com/which-is-the-better-value-for-me-aluminum-or-copper-flashing/.
(2) Copper or Aluminum flashing – Home Improvement Stack Exchange. https://diy.stackexchange.com/questions/213461/copper-or-aluminum-flashing.
(3) Why Your Builder Chose Copper Flashing. https://copper.org/applications/plumbing/restools/cu_brchrs/why_bldr_chse_cu_flshng.html.
How do I install step flashing around my chimney?
Installing step flashing around your chimney is essential to prevent leaks and ensure proper water shedding. Here’s a step-by-step guide on how to do it:
Gather Materials and Remove Old Flashing:
- Pry, chisel, and scrape off old metal flashings and roofing cement.
- Set up your ladder, roof brackets, and safety harness for safe work.
- Measure the chimney and order the necessary parts, including step flashing and saddle (see “How to Buy Chimney Flashing” below).
Install the Chimney Saddle:
- The saddle is a piece of flashing that sits on top of the chimney.
- Nail it down with gasketed roofing nails spaced every 6 inches, down 2 inches from the top edge.
- Cover the top edges of the saddle flange with a strip of peel-and-stick bituminous membrane.
- Overlap the membrane with shingles.
- Caulk the top edges of the saddle, cricket, and step flashings with urethane caulk to seal them to the chimney.
Install Step Flashing:
- Snip and bend a piece of prebent 8-inch square step flashing to fit around the front corner of the chimney.
- Apply a jelly bean–sized dollop of caulk at the corner where the chimney meets the roof.
- Place the step flashing against the chimney and under the shingle above it.
- Repeat this process for each side of the chimney, ensuring proper overlap and water shedding.
Layer the Flashing:
- Layer the step flashing pieces as you work your way up the chimney.
- Each piece should overlap the one below it by at least 2 inches.
- Secure the step flashing to the roof deck using roofing nails or screws.
Seal the Joints:
- Apply a continuous bead of polyurethane caulk along the joints between the step flashing and the chimney.
- Ensure a watertight seal to prevent any water infiltration.
Continue with Roofing Installation:
- Install the remaining shingles around the chimney, overlapping the step flashing.
- Follow standard roofing practices for the rest of the roof installation.
Remember that flashing a chimney is an advanced DIY project, and safety precautions are crucial. If you’re comfortable working on a roof and follow these instructions carefully, you can successfully flash your chimney and save money on repairs.
For more detailed diagrams and visual instructions, you can refer to resources like the Family Handyman or Fine Homebuilding articles on chimney flashing installation.
Source:
(1) Installing Chimney Flashing (DIY) | Family Handyman. https://www.familyhandyman.com/project/installing-chimney-flashing/.
(2) Installing Chimney Flashing – Fine Homebuilding. https://www.finehomebuilding.com/project-guides/roofing/installing-chimney-flashing.
(3) How To Install Roof Flashing Around A Chimney. https://www.shopchimney.com/info/video/how-install-roof-flashing-around-chimney.
(4) How to Install Chimney Flashing | Shingle Roof Install Guide. https://www.youtube.com/watch?v=JG883u0aRXo.
(5) How to .. Step Flash / Step Flashing around a Chimney – YouTube. https://www.youtube.com/watch?v=otcIi-CXy0Q.
tag: # Method Statement for Aluminum Flashing Installation
